SwiGO SuperSmart — Quick Setup

IoT Timer Switch with Power Sensor · Choose any installation method among A / B / C based on your need

A · Setting up with the EVIQtech IoT App

Android phone or tablet — Bluetooth pairing sets WiFi and cloud in one go

1App Install and prepare

  • Android Device - On Google Play search EVIQtech IoT and install the app
  • Turn ON WiFi and Bluetooth in Android device
  • Allow Location — Android lists WiFi networks only when location is on
  • Have your 2.4 GHz WiFi password ready (5 GHz not supported)
  • Make sure the SuperSmart is powered
2Start Bluetooth pairing

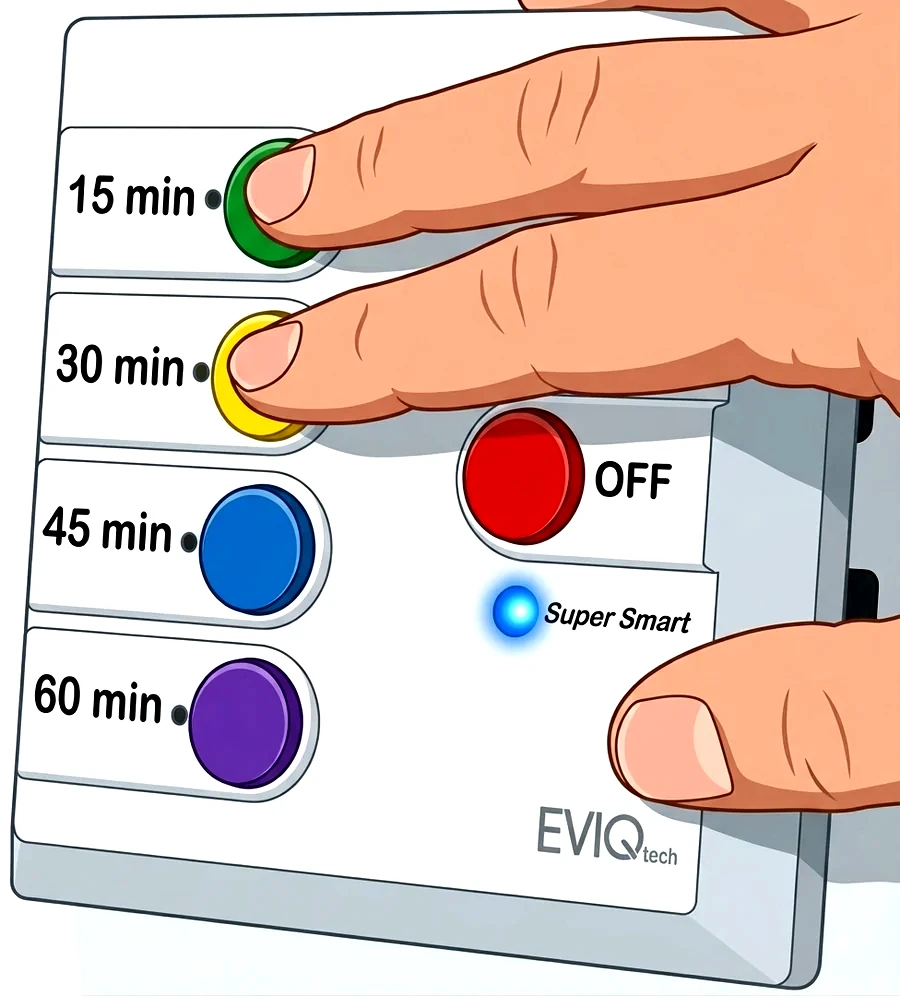
  • Hold Green + Yellow together for 5 seconds
  • The blue LED blinks fast — pairing is on for 10 mins
  • Move closer to the SuperSmart
  • Finish step 3 and 4 fast
  • Hold Red 5 s to leave pairing mode
Holding the Green and Yellow buttons

3Add and select the device

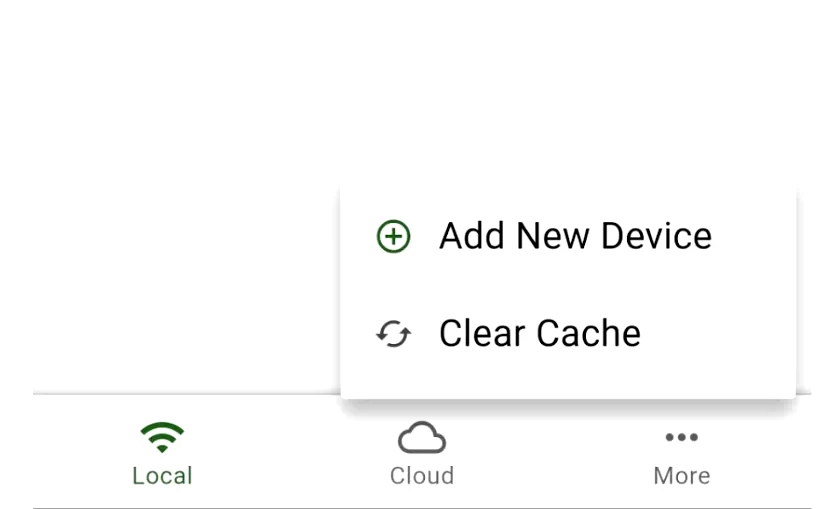
  • Tap More Menu (…) bottom right → Add New Device
  • Allow nearby devices and precise location
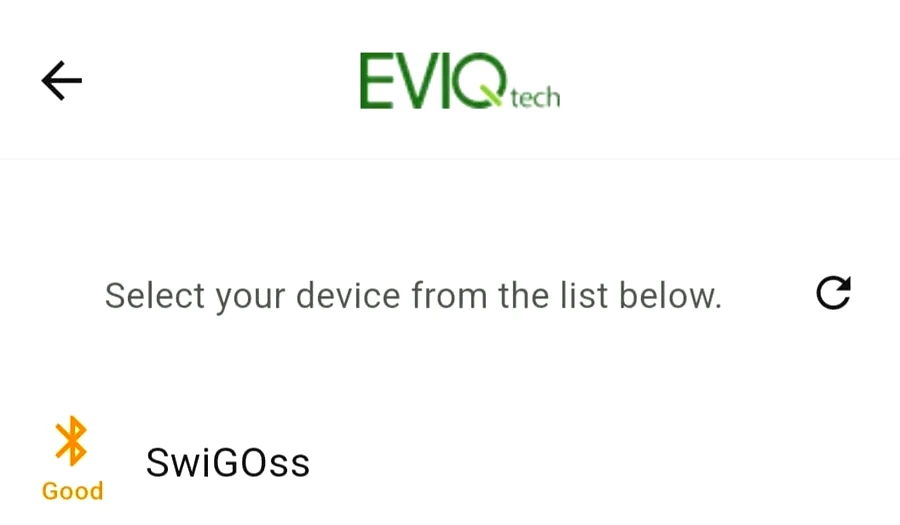
  • Tap SwiGOss when it is listed
Add New Device menu SwiGOss found

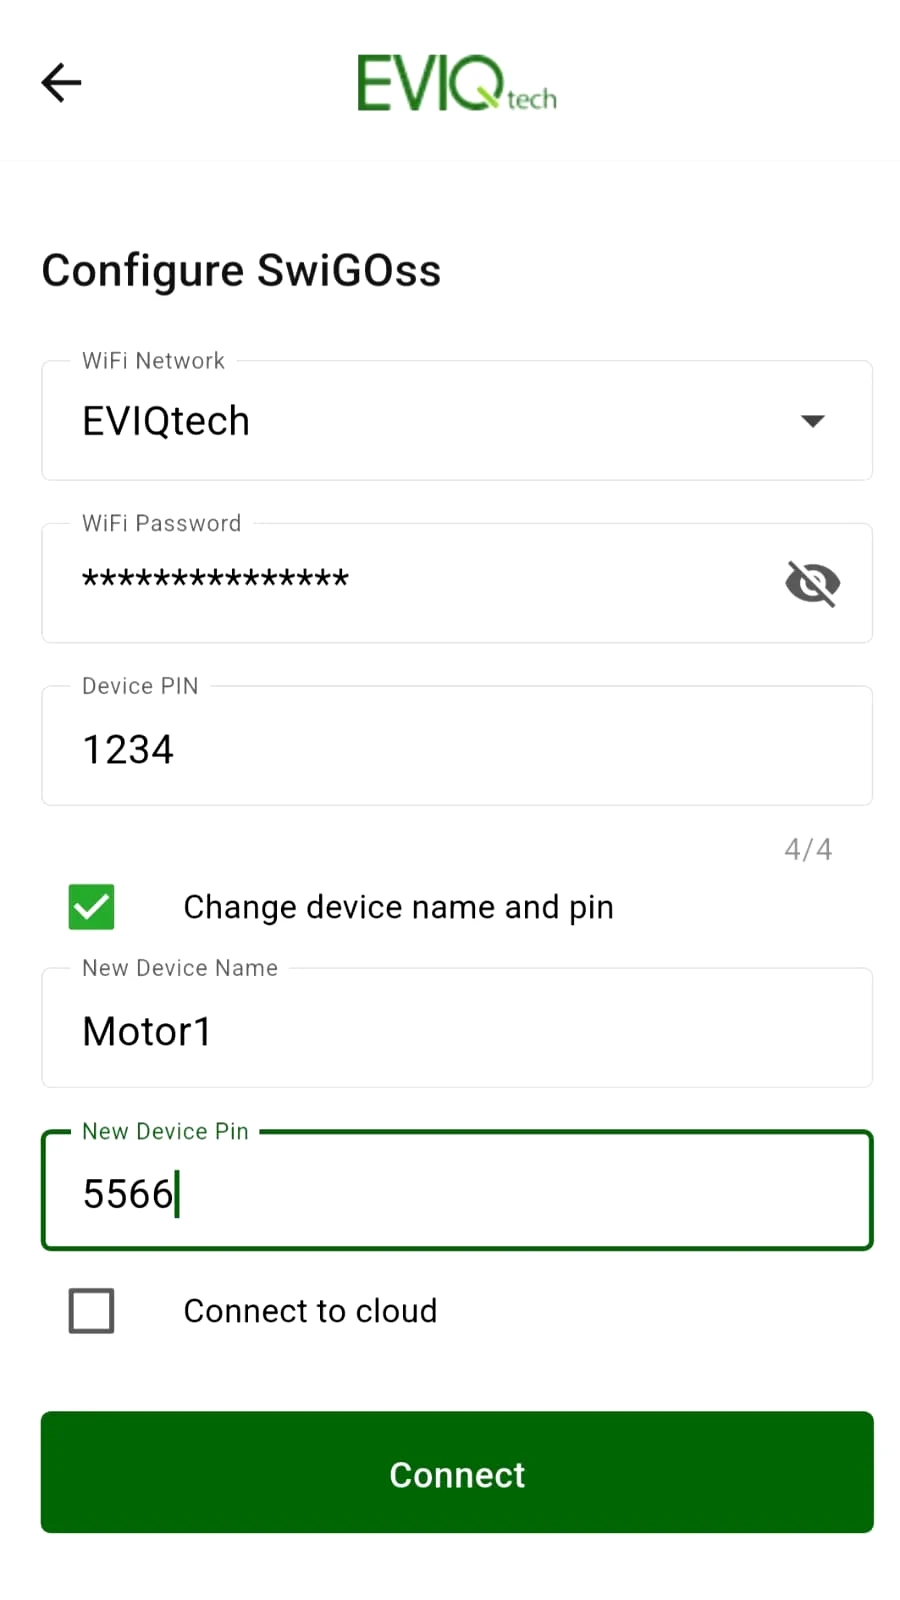
4Configure the device

  • Select 2.4 GHz WiFi with password
  • Enter Device PIN (Default 1234)
  • Enter → new name + 4-digit PIN
  • (Optional) tick Connect to cloud, enter your email
  • Tap Connect
Configure page: WiFi, Device PIN, new name and PIN, Connect to cloud

5Open it on your WiFi

  • Connect your phone to the same WiFi as the device
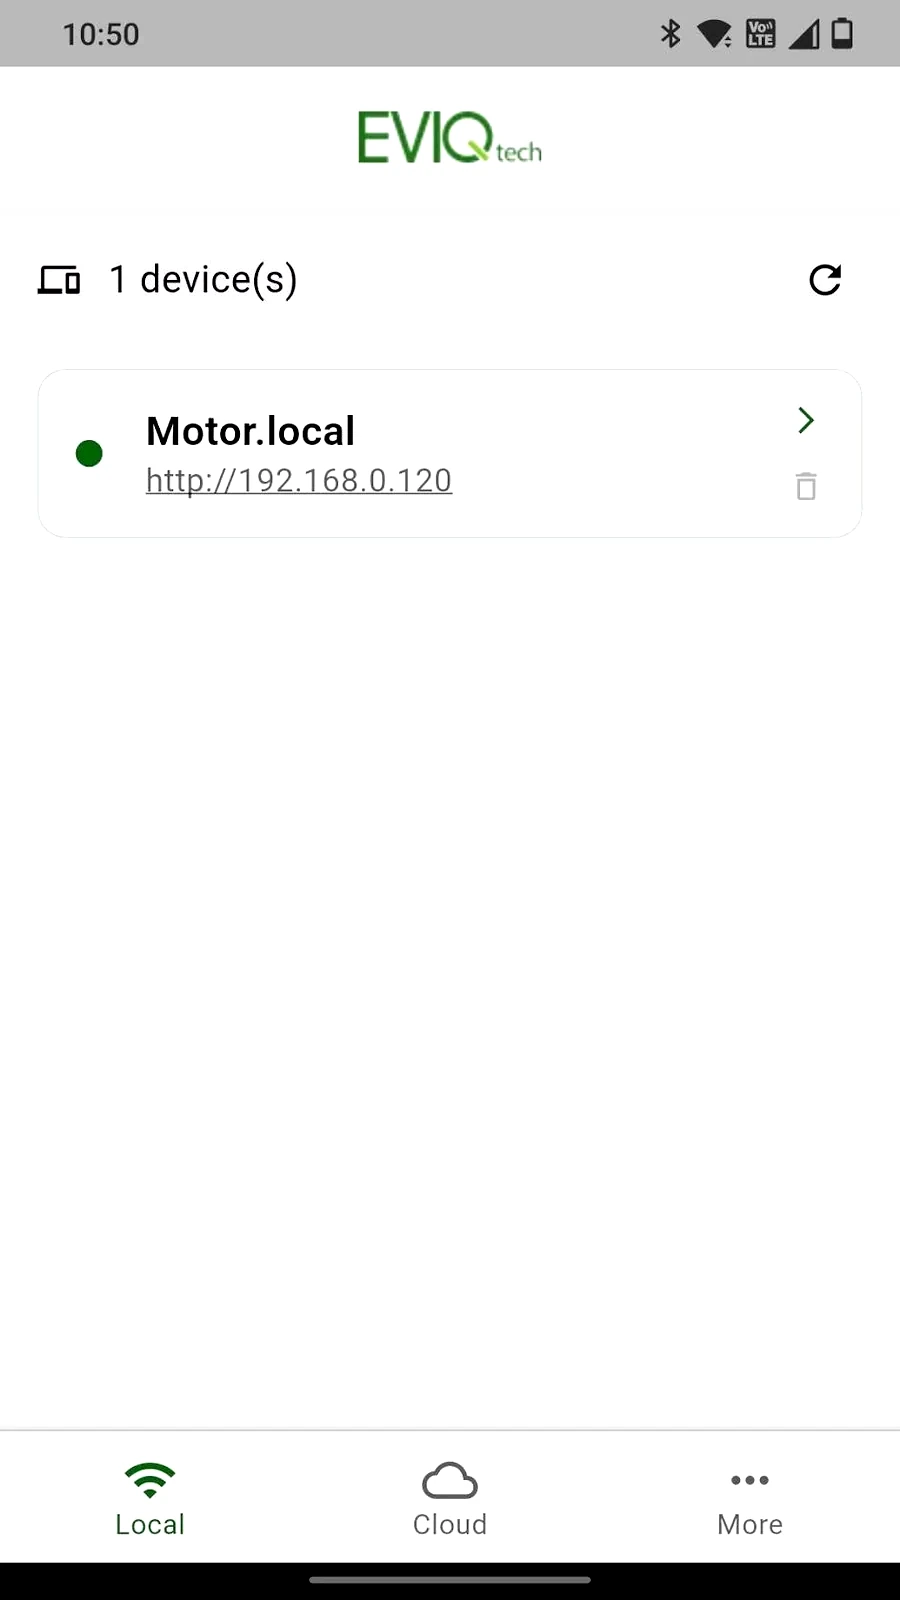
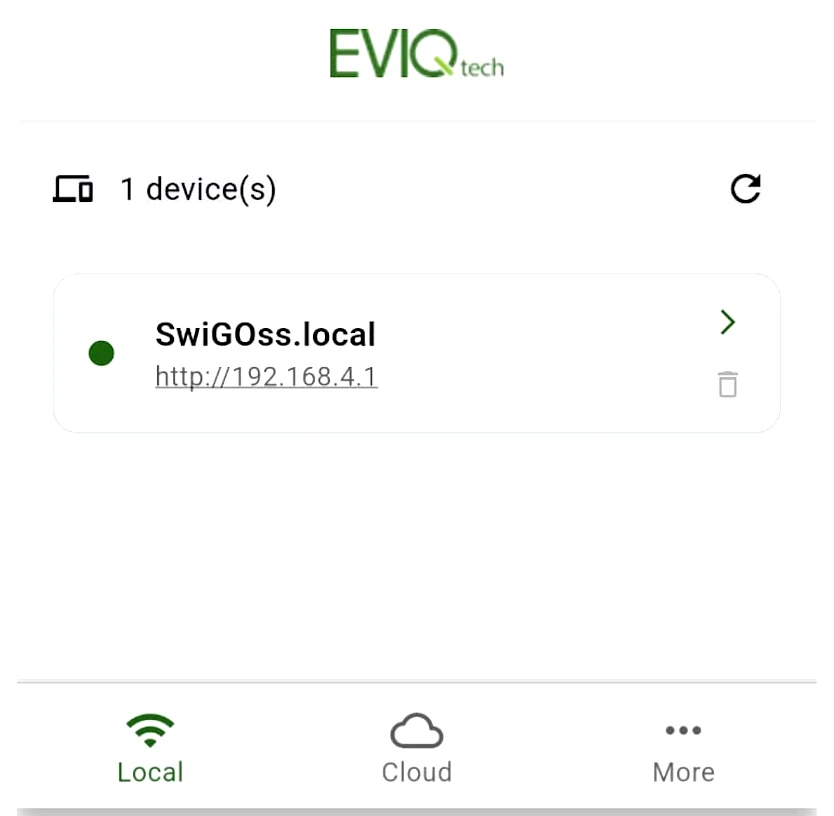
  • Device appears in the app's Local tab with its name and IP
  • Tap it, enter your PIN, tap Unlock
  • Home page: timer, ON/OFF, readings, schedules, protection
Local tab with the device listed

6Cloud sign-in

  • Only if you ticked Connect to cloud in step 4
  • Check your email — look in spam too
  • Open the link and set your password
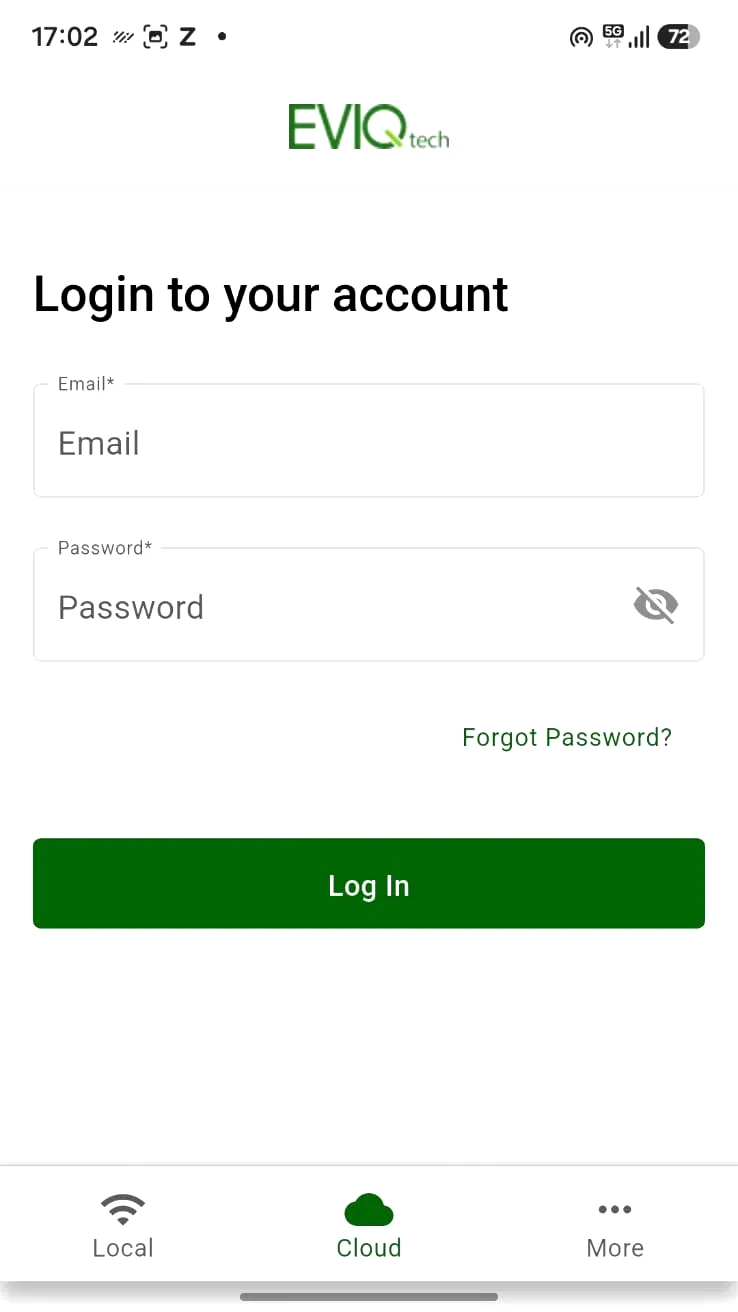
  • Sign in on the Cloud tab and operate
  • Or browse iot.eviqtech.com
Cloud login screen

B · Setting up from a browser

iPhone, iPad, Mac, Windows or Linux — no app to install

1Power on and find Access Point

  • Power on the SuperSmart
  • Within about 10 seconds it creates its own WiFi network
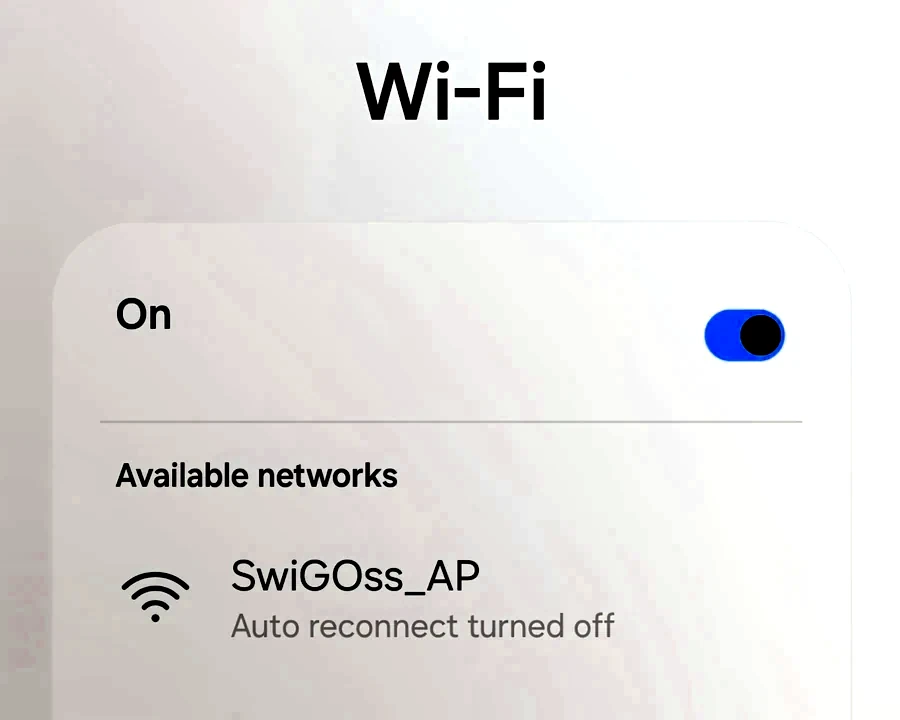
  • Look for SwiGOss_AP in the WiFi list
  • Have your 2.4 GHz WiFi password ready
SwiGOss_AP in available networks

2Join and stay connected

  • Connect to SwiGOss_AP — it is open (No password required)
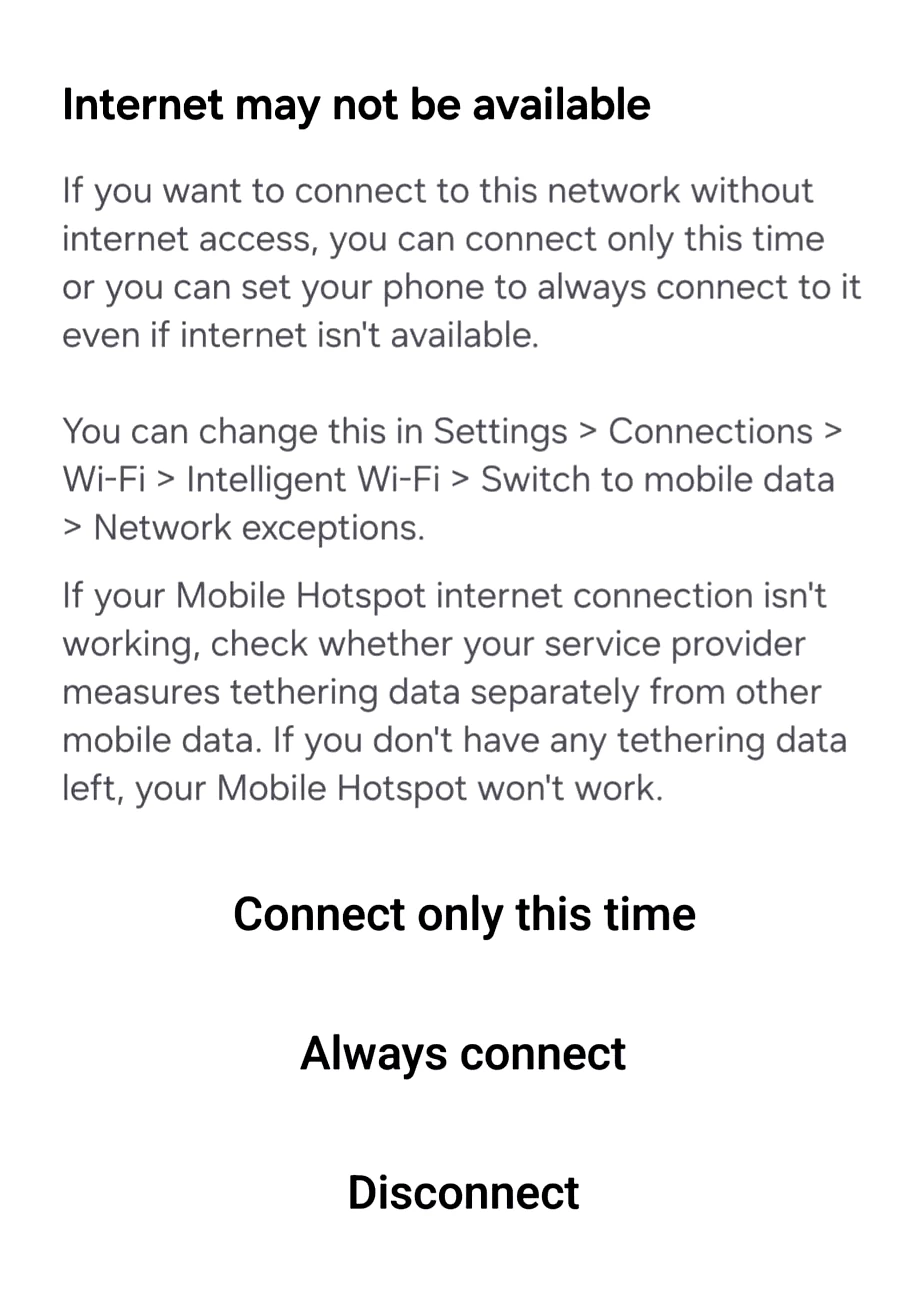
  • If warned “Internet may not be available”, choose Always connect
  • Turn mobile data off, and pause any VPN (This step may be required on some Android devices)
Internet may not be available prompt

3Fill in the setup page

  • In any browser open http://192.168.4.1
  • Make sure it is http:// (not https)
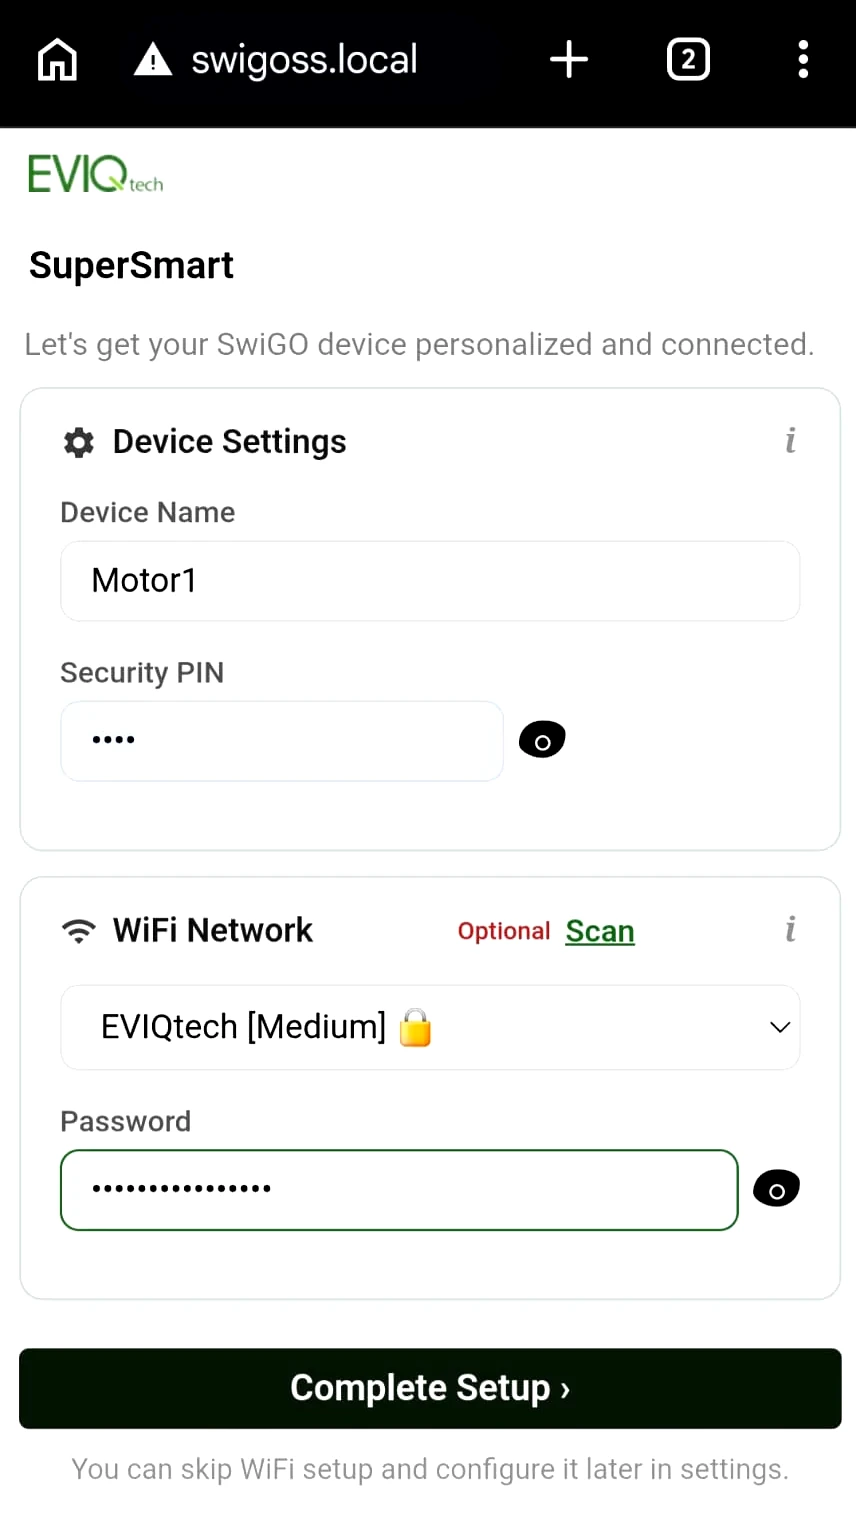
  • Enter a Device Name and 4-digit Security PIN
  • Optional: pick your 2.4 GHz WiFi + password
  • Tap Complete Setup
Initial Setup page with device name, PIN and WiFi

4Reconnect and refresh

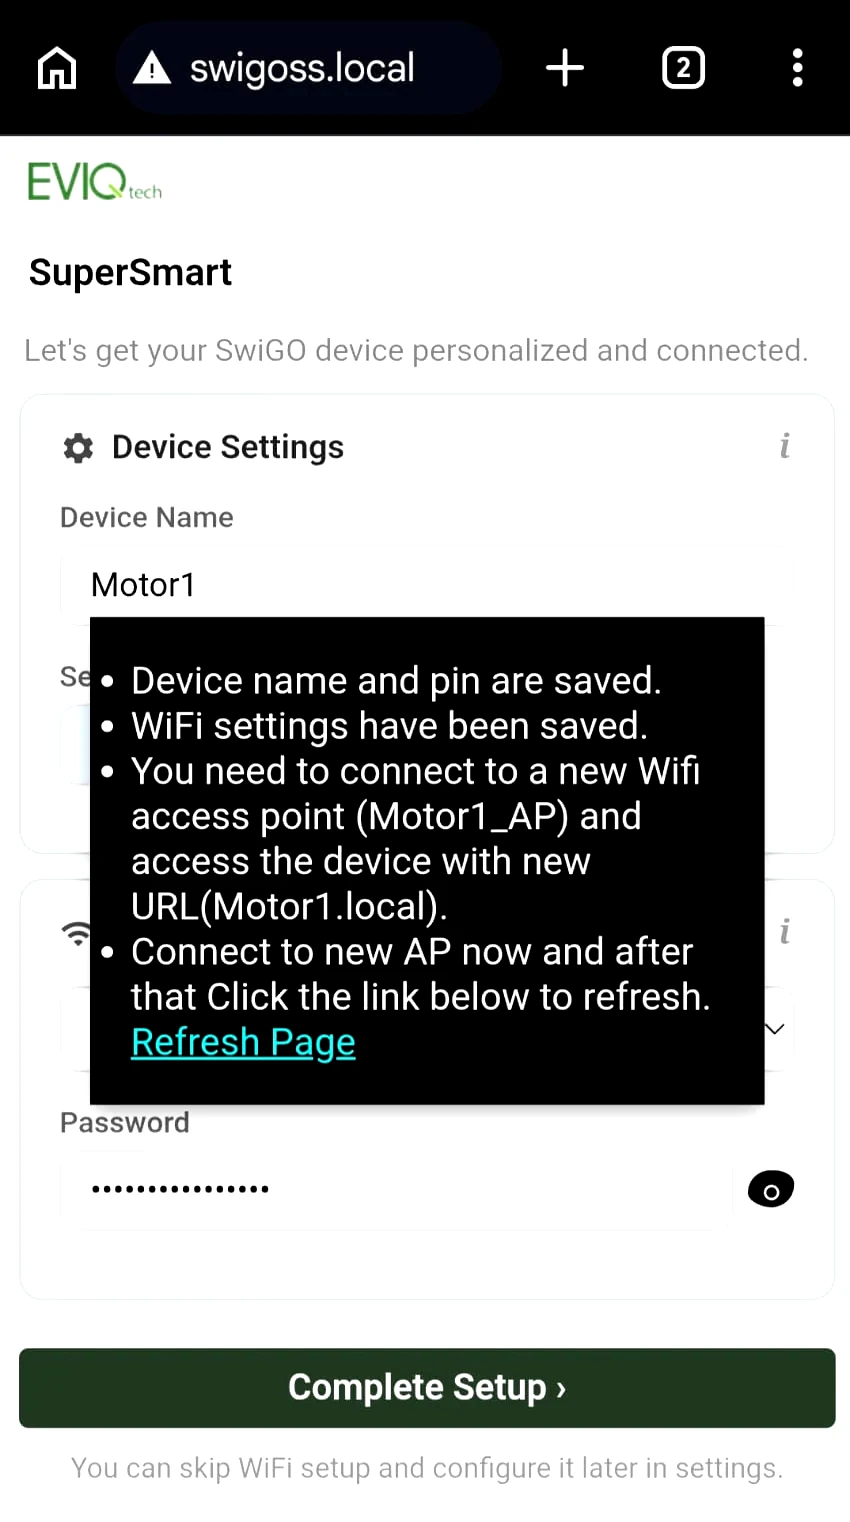
  • The confirmation lists what was saved
  • Device changes AP name to DeviceName_AP
  • Join that new network
  • Tap Refresh Page
  • If WiFi details are given the device will connect to WiFi network in a few seconds
Setup saved confirmation with Refresh Page

5Unlock and use it

  • Open http://DeviceName.local (e.g. motor1.local) or http://192.168.4.1
  • Enter your PIN and Unlock
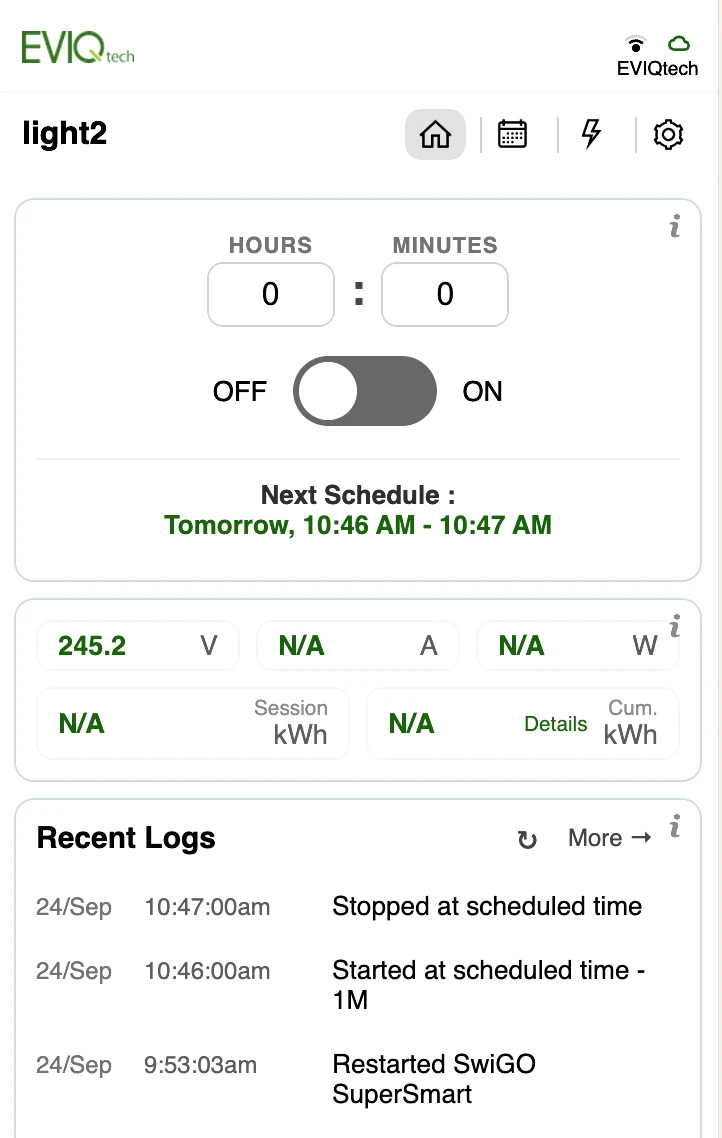
  • Device interface will open
  • If the device joins WiFi, the Top right corner will show the network
Device interface: timer, ON/OFF, next schedule, readings and recent logs

6Add the cloud (optional)

  • With the device on your WiFi, open Settings gear icon → Cloud Settings
  • Enter your email and tap Connect to Cloud
  • Open the emailed link and set your password
  • Sign in at iot.eviqtech.com from any browser
  • Needs firmware 1.18.0 or later

C · Using the EVIQtech IoT App in Local Only mode

No router, no internet — Schedules and protections stay on the device itself
1 Power on and find & join the Access Point — refer B1 & B2
2 Open the device in the app — go to the Local tab, tap the device listed and enter your PIN
3 Fill in the setup page refer B3
4 Reconnect to new AP and repeat step 2
Local tab listing SwiGOss.local at 192.168.4.1
QR code to the quick setup guide
Quick setup guide
www.eviqtech.com/quick-start/swigo-supersmart.html
QR code to the full user manual
Full user manual
www.eviqtech.com/manual/swigo-supersmart/
Fault indicators (LED)
Fault LEDs Timing
Dry-run (under-current) LED 1 + right RED Blinks 6s; stops 7s after start, or 4s into a run
Overload (over-current) LED 2 + right RED Blinks 6s; stops 7s after start, or 4s into a run
Under-voltage LED 3 + right RED Continuous; trips within 7s
Over-voltage LED 4 + right RED Continuous; trips within 7s
Tank full LEDs 4, 3, 2, 1 Bottom to top, one by one, twice
Support: info@eviqtech.com · Cloud: iot.eviqtech.com